Key Highlights
- The desktop computers that most people use do not come with wireless network built in. You will need an adapter if you want a wireless connection.
- You can add wireless connectivity to your PC in two main ways. Use a usb adapter or put an internal PCIe card in your desktop.
- A usb adapter is the easiest way to go. Just plug it in to connect to wireless.
- An internal card could give you better performance. But you will have to open the case of your computer to put it in.
- If you still use an ethernet cable and feel stuck to your desk, a wireless adapter will let you move your desktop and still connect.
- You can check your network adapters through Device Manager. This will help you see if your pc already has wireless capability.
Introduction
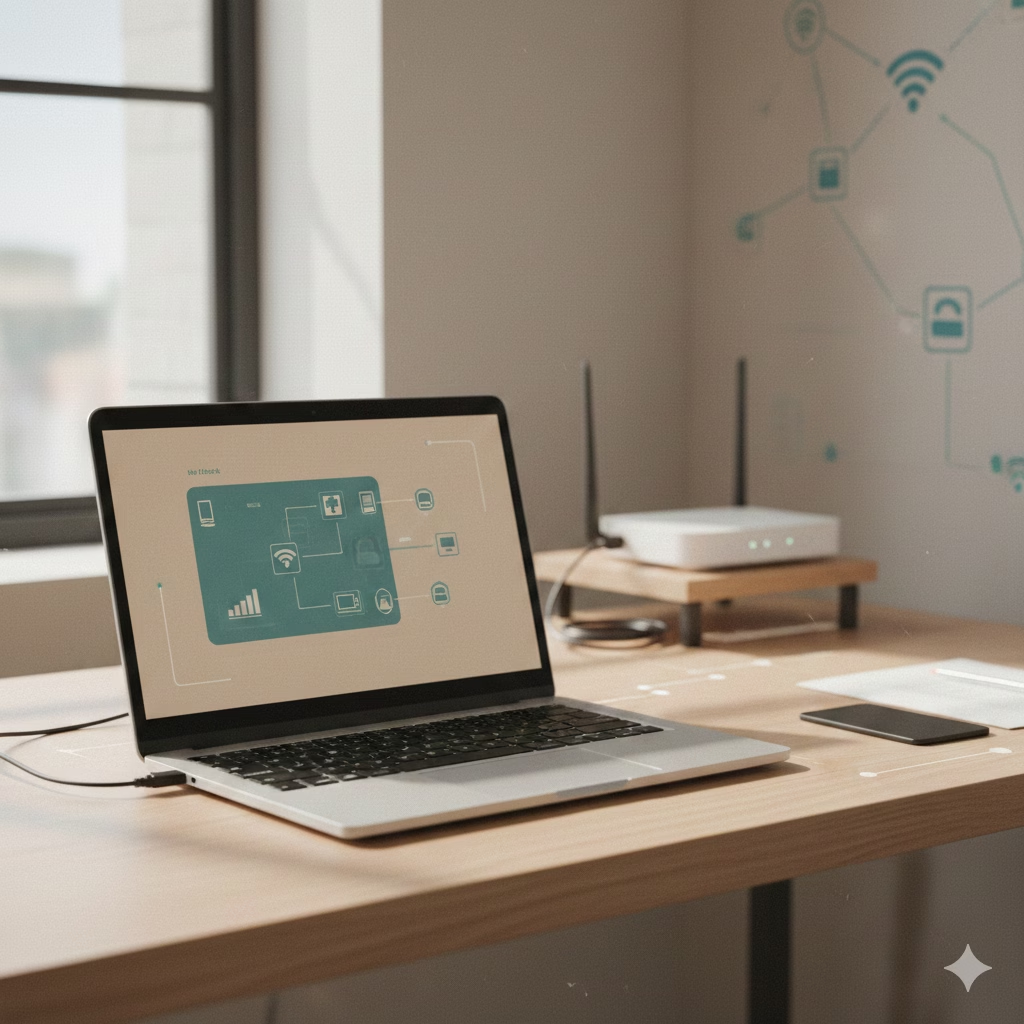
Is your desktop computer stuck in one place because it has to be plugged into the internet? Many desktop computers don’t have Wi-Fi built in, unlike laptops. This can be a problem if your router is far away. The good thing is you don’t have to run long cables over the floor. A simple wireless adapter can let your desktop use a wireless network. This means you get more freedom and better internet connectivity. This guide will show you, step by step, how to check your desktop and how to connect to wireless internet. If you run into problems with wireless or your connection, our small business tech support team is here to help.
Understanding How Desktops Connect to Wi-Fi
Most laptops and smartphones be made for people who want to move around. This is why most of them have Wi-Fi inside already. A desktop computer on the other hand is usually set up to have a good, wired connection that does not drop. The makers of desktops often do not put the parts for wireless connectivity inside. So, many desktop models do not have hardware to use wireless.
To connect your desktop to a wireless network, you need a wireless network adapter. This adapter lets your desktop pick up signals from your router. You do not have to use a cable for internet access. Your operating system sees this adapter and helps you find and join a wireless network. After that, you can get on the internet from your desktop.
Checking if Your Desktop Has Built-In Wi-Fi
Before you buy something new, make sure to see if your desktop already has wireless. Some prebuilt desktops, like latest or smaller ones, might come with wireless devices in them. A fast check can help you with your time and money.
The easiest way to check in Microsoft Windows is to look at the taskbar. You will find this at the bottom right near the clock. If you see a Wi-Fi icon, it looks like several curved lines. This means your computer can use wireless. If you see a computer symbol with a wire, you likely do not have wireless on your device. This is a simple way to know more about your microsoft windows and wireless status.
To get a clearer answer, go to your computer’s Start menu. Type “Device Manager” and open it. Find the category called “Network adapters.” If there is something with “Wi-Fi,” “Wireless,” or “802.11” in the name, the wireless adapter is in your system. If you see only “Ethernet” or “Gigabit,” you will not have the wireless adapter, so you need to get an external adapter.
Common Signs Your PC Needs a Desktop WiFi Adapter
Not sure if you should get a new adapter? There are some clear signs that say your setup may need one. The biggest clue is when your desktop can’t connect to the internet without plugging in an ethernet cable.
Another reason is poor performance with your built-in Wi-Fi. If it is old, you can get slow speeds. Connections might also drop, or you might not be able to connect to new networks. A newer wireless adapter can give you a faster and more steady connection. A wireless adapter that supports a 5GHz or 6GHz band will let you use new features and get better speeds.
Here are some signs that show you need to get a desktop Wi-Fi adapter:
- Your PC can connect to the internet only when you plug it straight into the router.
- You do not see the Wi-Fi icon, and there are no options in Windows to look for wireless networks.
- Right now, your wireless connectivity is slow, not steady, or it keeps dropping.
Choosing the Right Wi-Fi Adapter for Your Desktop
After you find out that your desktop needs a wireless adapter, the next thing to do is pick the best one. There are two main kinds to choose from. You can get a USB adapter or a PCIe adapter. Both will let you get internet access on your desktop. But, they are not the same when it comes to how you set them up and how well they work.
A USB Wi-Fi adapter is a small item that plugs right into the USB port on your computer. It is easy to use and set up. A PCIe adapter is a card that you put inside your computer’s case, into a slot on the motherboard.
Let’s talk about how they are different, so you can know which one works best for you.
Comparing USB WiFi Adapter for PC vs Internal Wi-Fi Card
The big difference between a USB adapter and an internal Wi-Fi card, also called a pcie adapter, is about what you find easier and what works better. A wireless usb adapter is very easy to use. You can just plug it into any usb port on your pc and it will start to work. Windows will often set it up for you, so you do not need to do much yourself. This is good if you do not feel okay with taking your pc apart or putting parts inside it.
An internal pcie adapter is a card you put inside your computer. You need to open the case and fit the adapter into a pcie slot on the motherboard. This is a bit more work, but it can give you faster and more stable connections. This happens because the pcie adapter connects right to the motherboard. Most of the time, these adapters also have bigger and stronger external antennas.
Here is a quick comparison:
|
Feature |
USB WiFi Adapter |
Internal (PCIe) Wi-Fi Card |
|---|---|---|
|
Installation |
Plugs into a free USB port; very easy. |
Installed inside the PC case; requires opening the computer. |
|
Performance |
Good, but can be slightly slower than PCIe. |
Generally offers the best speeds and more stable connections. |
|
Portability |
Easy to move between different computers. |
Tied to one computer once installed. |
|
Antennas |
Can be small and internal or larger external ones. |
Almost always has larger, high-gain external antennas. |
Factors to Consider When Shopping for a Desktop WiFi Adapter
When you want to buy the adapter, the specifications that matter most will affect how well it works. The Wi-Fi standard is at the top. You need to find adapters with modern standards. Look for Wi-Fi 6 (802.11ax), Wi-Fi 6E, or Wi-Fi 7. These help you get better performance. It is good for homes with a lot of devices connected.
The frequency band is important when you use a usb adapter. Dual-band adapters work on both the 2.4GHz band and the 5GHz band. Some new adapters also use the 6GHz band. The 5GHz band and the 6GHz band are faster and have less traffic on them. This is good for streaming and online gaming. For a usb adapter, you need to have a free usb port on your device. A usb 3.0 port is better than usb 2.0. It lets you get faster data transfer speeds if you want to use your adapter for games or movies.
Consider these factors for the best results:
- Wi-Fi Standard: Look for Wi-Fi 6 or a newer one. You will get faster speeds and the connection will work better.
- Bands: A dual-band or tri-band adapter lets you use the fast 5GHz and 6GHz bands.
- Antennas: It is good to get models that have high-gain external antennas. This can help you get a better signal.
What You’ll Need Before Getting Started
Get everything you need before you start the installation. This will help things go quickly and be stress-free. If you are ready, you can set up wireless connectivity with no delays or problems.
You will need to get the Wi-Fi adapter. It may be a USB adapter or it can be the kind you put inside your computer. You must also have the name of your Wi-Fi. Some people call this the SSID. You have to have your Wi-Fi password as well. Make sure there is a free USB port or an open PCIe slot in your computer for the adapter. In the next sections, you will see what hardware and software you will need to use.
Required Hardware and Where to Buy a Reliable USB WiFi Adapter for PC
The main thing you need is the Wi-Fi adapter. If you go with a USB adapter, try to pick one that has external antennas. The antennas help you get the best reception from your wireless router. You can move them and point them toward your router, which helps if your computer is not close to it. Some models, like the Nineplus adapter, come with two 5dBi antennas. These help to improve signal strength.
You can get many good usb Wi-Fi adapters from online stores like Amazon, Best Buy, or Newegg. Brands such as TP-Link, Netgear, Asus, and MSI are known for making products that work well in networking. When you pick one, look at what other people say in the reviews. This helps you know if it works well and if it is easy to set up.
Here’s what to look for in a physical adapter:
- High-Gain Antennas: These help your adapter get better signal strength and range.
- USB 3.0 Compatibility: This lets you use the fastest speeds the usb adapter and pc can have.
- Included Stand or Cable: Some adapters have a stand or cable. This lets you move the adapter away from the pc for best reception instead of keeping it right behind the usb ports.
Software Essentials: Drivers and System Compatibility Checks
You need both hardware and software to make things work. The software you need is called a driver. A driver is a small program that helps the operating system talk to and manage your Wi-Fi adapter. If you do not have the right driver, your new hardware will not work.
Many new Wi-Fi adapters work as “plug-and-play” on newer versions of Microsoft Windows, like Windows 10 and Windows 11. When you plug in the adapter, the operating system should find it and put in the right driver by itself. But, it does not always be that simple. You should read the details from the manufacturer to make sure the adapter will work with your Microsoft Windows system.
If your system does not put in the driver by itself, you have to do it yourself. A lot of adapters have a driver CD that comes in the box. If your PC does not have a place for a CD, you can go online to get the latest driver from the maker’s website. You need to be on a computer with an internet connection so you can download it. After you get the driver, move it over to your PC with a USB stick.
Step-by-Step Guide to Connecting Your Desktop to Wi-Fi
Now that you have your adapter and know the basics, you can set up your desktop. This is an easy process. It should take just a few minutes to finish. You may use either a usb adapter or an internal card. The steps here will help you get wireless connectivity on your desktop.
We will go through everything you need to do. First, we will talk about a final check for your system. Then, we will cover how to set up the hardware and software. After that, we will show you how to connect your computer to your Wi-Fi. We will also let you know what to do if it does not work the first time. Just follow the steps to get your computer online.
Step 1: Check for Existing Wi-Fi Hardware and System Readiness
Before you plug in anything, do one last check. Go to your Device Manager and look under “Network adapters.” This helps you make sure you are not installing hardware that will not work well with other wireless devices you have. If you want to replace an old or faulty adapter, uninstall its drivers first. This way, your new wireless adapter will work better and not have problems.
Next, check that you have enough space to connect your new adapter. If the adapter uses usb, find a free usb port on your computer. A USB 3.0 port gives you better speed, and it is usually blue. If you have a PCIe card, open your computer and see if there is an open PCIe x1 slot. This slot is short and found on the motherboard.
Finally, double-check system compatibility.
- Make sure the adapter works with your operating system, like Windows 10 or Windows 11.
- Have your Wi-Fi network name and password ready to use.
- If you need to download drivers, be sure you can get them on the desktop.
Step 2: Install and Set Up Your USB WiFi Adapter or Internal Card
It is easy to put in a USB Wi-Fi adapter. Just plug the adapter into a free usb port on your computer. If your adapter has external antennas, screw them on the adapter. If you have a cradle or extension cable, you can use that. Place the adapter with the cable on your desk to get a better signal. That is all you need to do for setting up the adapter with your usb.
If you have a PCIe card that you need to install inside the computer, there are a few steps. For this, you need to turn off your computer all the way. Unplug it from the wall to be safe. Open the computer case. Find a PCIe x1 slot on the motherboard that is free. Take out the metal bracket at the back that lines up with this slot. Put the card into the slot and push it in until you feel it click. Use a screw to secure the card. Close the case. Plug your computer back in.
After you put the hardware in, turn on your computer. The operating system will see the new device when you start it. This gets it ready for the driver to be installed.
Step 3: Install Necessary Drivers for Your Device
Once the adapter is in, you need to put in the driver next. If you use Windows 10 or 11, the operating system may do this by itself. It will see the new adapter and start to download a matching driver from microsoft. A message may show up on your screen, telling you a device is being set up.
If nothing starts by itself, you will have to put in the driver manually. When your adapter comes with a driver cd and your computer has a place to use discs, put in the cd and open the setup program. Just follow what the screen tells you to finish the setup. This is a good way to do it if you do not have any other way to get online.
The best way is to get the newest driver from the manufacturer’s website. This helps you have the latest software for your desktop. It can make things work better and fix bugs. If your desktop does not have internet, use another device that is online to download the file. Save the file to a USB drive. Then, put the USB in your desktop and run the installation.
Step 4: Connect to a Wi-Fi Network in Windows
Once the drivers are set up, you can connect to a network. In microsoft windows, find the network icon at the bottom-right part of your screen. It is in the system tray. The icon will now look like a Wi-Fi symbol, not the wired connection symbol you used to see. Click the icon. A list with wireless networks will come up.
Find your home or office wireless network in the list and click on it. If your router has both 2.4GHz and 5GHz bands, there may be two wireless network names that look almost the same. To get faster speeds when you are close to the router, pick the 5GHz or 6GHz one. Click the “Connect” button when you find the one you want.
The system will ask you to type in the network security key. This is your Wi-Fi password. Be sure to type the password the right way, because it is case-sensitive. Click “Next” when you finish. Soon, your desktop will connect to the wireless network. You will then have internet access.
Step 5: Troubleshoot If No Networks Are Detected
Sometimes, even when you do all the steps, you may not see any Wi-Fi networks. Do not worry, the problem is common and there are several easy ways to fix it. The first thing to look at is the hardware. Make sure the usb adapter is plugged in the right way, or check if the PCIe card is in its slot well.
If the hardware seems fine, the issue may be with the drivers or signal strength. Try to reinstall the driver using the driver CD, or download a new one. If your adapter has an antenna, check that it is on tight. You can also move the antenna to see if the signal improves.
Here are a few troubleshooting steps to try:
- Restart your computer and your router. This often fixes lots of connectivity problems.
- Move the adapter to another USB port. Try to use one on the back of the computer if you can.
- Open Device Manager again. Make sure the adapter is there and does not show a yellow mark. A yellow exclamation mark points to a driver problem.
Alternatives to Standard Wi-Fi Adapters
While a USB adapter or a PCIe card is one of the easiest ways to add wireless connectivity to a desktop, there are also other options. These choices can help in some special cases. For example, you may need the strongest internet connection you can get, or you might need internet access right away. In these times, a different adapter or method works well. The main thing is to get wireless connectivity for your desktop so you can use the internet without any trouble.
One way you can get the internet is with a wired ethernet connection. There are some good points to using ethernet. You might not need to buy anything new, because you can also use your smartphone for this for a short time. Let’s talk more about these two choices.
Using Ethernet vs WiFi Desktop Connectivity
Even though Wi-Fi is easy to use, using a wired ethernet connection still gives you some good things. When you plug your desktop into your router with an ethernet cable, you get the strongest and quickest internet connectivity that your internet plan can give. This way of connecting is not hurt by signal problems like Wi-Fi sometimes is.
This direct link gives you lower latency. Latency means the wait time when data moves from one place to another. Lower latency is important for things like online gaming and video calls. In both, each little bit of time matters a lot. If your desktop is near your router and you do not need to move it, using an ethernet cable is a good and easy way to get connected. Using ethernet helps you get faster and better internet.
Key benefits of Ethernet include:
- Better Speeds: You will often get faster and more steady speeds than you do with wireless connections.
- Stable Connections: These are not hit by wireless noise from other things in the area.
- Lower Latency: This is great for gaming, streaming, or making video calls.
How to Use Your Smartphone as a Wi-Fi Adapter for Your Desktop
If you want to get internet access on your desktop and you do not have a wireless adapter, you can use your smartphone to get online for now. This is called USB tethering. With USB tethering, you share your phone’s internet connection with your PC. Your phone uses its data or Wi-Fi, and then sends the internet to your computer.
To do this, use a USB cable to link your phone to your desktop. Go to the settings on your phone. There, look for choices like “Mobile Hotspot,” “Tethering,” or “Personal Hotspot.” Once you open that menu, find the “USB tethering” option and turn it on.
Your desktop will find the new network link by itself and let you get internet access. This way to internet is not a long-term fix. It can use up your phone’s battery and mobile data. Still, this is a good tip when you have an emergency. You can use it to download drivers you need for your new Wi-Fi adapter.
Conclusion
Connecting your desktop to Wi-Fi is not hard. The steps you need to follow are easy to understand. First, check if your desktop has wireless support built in. If it does not, you will need to pick the right wireless adapter. Follow our guide step by step to get online fast. Make sure all the drivers you need are set up as well. If you hit a problem while connecting, see what you can do to fix it. Using wireless can make it better for you to work and be online. If you have questions or need help, feel free to ask. There are just a few steps between you and a smooth online experience!
Frequently Asked Questions
Are there desktops with built-in Wi-Fi, or do I always need an adapter?
Many older desktop computers need a wireless adapter to connect to Wi-Fi. Newer PCs, like all-in-one and small models, often come with Wi-Fi built in. You should check your system’s details or find the wireless symbol in your operating system. This will help you know if your desktop has wireless connectivity or if you need an adapter.
What should I do if my desktop can’t find any Wi-Fi networks?
If you do not see any wireless networks, you should first restart your computer and router. Make sure that the wireless adapter is plugged in right and that the drivers are set up well. If your adapter has external antennas, check that they are tight and point them to get the best signal strength. Many times, putting the driver in again can fix the issue.
How do I manually connect my desktop to a Wi-Fi network in Windows 10?
In Windows 10, go to the network icon on the taskbar. From the list, pick the wireless network you want. Click “Connect.” A box will show up and ask for the wireless network security key or Wi-Fi password. Put in the password. Click “Next.” The network setup is now done, and you can use your wireless connection.
What drivers are needed for a new desktop WiFi adapter?
A wireless adapter must have a driver to work with your operating system. Today’s Windows will usually find and set up this driver for you. If it does not, you need to install it yourself. You can do this by using the CD that comes with the wireless adapter, or you can go to the maker’s site and download the newest driver.
Using a Wi-Fi Enabled Motherboard for Desktop Connectivity
A Wi-Fi enabled motherboard is an excellent choice for anyone looking to connect their desktop to a wireless network easily. This type of motherboard comes with built-in Wi-Fi capabilities, eliminating the need for an additional wireless adapter. By integrating the wireless functionality directly into the motherboard, manufacturers provide a more streamlined and space-efficient solution. Installation is straightforward; there’s no need to open your computer case or deal with any extra cables. Simply ensure your operating system has the latest drivers, and you can start connecting to your Wi-Fi network in just a few clicks. Not only does this option simplify the process of getting your desktop online, but it can also lead to better connectivity, thanks to the optimized placement of antennas on the motherboard. If you’re considering building or upgrading your desktop and want the added convenience of wireless internet access, opting for a Wi-Fi enabled motherboard can save you time and hassle, while providing reliable performance.
Step-by-Step Guide to Setting Up a Wi-Fi Network (Including Router Setup and Cable Connections)
Setting up a Wi-Fi network involves several essential steps to ensure your router is configured correctly and your devices are connected effectively. First, begin by positioning your router in an ideal central location within your home or office, away from walls or obstructions that might block the signal. Next, plug in your router to a power source and connect it to your modem using an Ethernet cable; this is usually done by connecting one end of the cable to the WAN or Internet port on the router and the other end to the modem. Once the physical connections are made, turn on both devices and wait for a minute until they fully boot up. Now, connect your computer or smartphone to the router using an Ethernet cable or through the default Wi-Fi network, which is often printed on the router. Open a web browser and type in the router’s IP address (commonly 192.168.1.1 or 192.168.0.1) to access the configuration page. From there, log in using the default username and password, also provided on the router or in the manual. After logging in, proceed to set up your Wi-Fi network name (SSID) and password to secure your connection. Make sure to save your settings, and then disconnect any Ethernet connections if you are using Wi-Fi. Finally, check if your devices can see and connect to your new Wi-Fi network, entering the password when prompted. With these steps followed thoroughly, you should have a functioning Wi-Fi network ready for use.
Connecting Older Desktops to Wi-Fi Using Internet Sharing
For those with older desktops that lack built-in Wi-Fi capabilities, utilizing Internet sharing can effectively bridge the gap. This method involves using another device, such as a laptop or a smartphone, that already has a Wi-Fi connection. By enabling Internet sharing on that device, you can create a mobile hotspot or share the connection directly to the older desktop via an Ethernet cable. To start, ensure that the primary device is connected to a Wi-Fi network. Navigate to the sharing settings where you can select the connection you wish to share and enable it for other devices. Once shared, connect the older desktop using an Ethernet cable or wirelessly if it’s compatible. With the right settings in place, you can seamlessly access the internet on your older device, unlocking a world of online resources that may have seemed out of reach before.
Troubleshooting No Wi-Fi Option on Desktop
When faced with the frustrating scenario of a missing Wi-Fi option on your desktop, several troubleshooting steps can help restore connectivity. First, ensure that your Wi-Fi adapter is enabled; you can usually find this in your desktop’s settings under Network & Internet, and then check the status of the adapter. If it’s disabled, simply toggle it back on. Next, verify if the correct drivers are installed for your Wi-Fi card. You can do this by going into the Device Manager, locating the network adapters, and updating or reinstalling the drivers as needed. Additionally, a simple restart of your desktop can refresh the network settings and may resolve any temporary glitches. If these steps do not work, consider using the Windows Network Troubleshooter, which can be accessed through the settings menu and may identify and fix issues automatically. Lastly, ensure that your desktop is physically capable of connecting to Wi-Fi; some older models may not have built-in Wi-Fi capabilities and might require an external USB Wi-Fi adapter for connectivity.
Upgrading to WiFi 7: Is It Worth It Without a WiFi 7 Router?
Upgrading to WiFi 7 is a significant consideration, especially as technology continues to advance rapidly. However, many users may find themselves asking whether the benefits of this upgrade are truly tangible without investing in a dedicated WiFi 7 router. While WiFi 7 promises faster speeds, lower latency, and improved performance in congested areas, the absence of a compatible router can significantly limit these enhancements. Without the right hardware, users may experience a bottleneck effect, rendering the faster capabilities of WiFi 7 redundant. Moreover, considering the additional cost involved in acquiring a WiFi 7 router, one must evaluate their current needs and internet usage patterns. If high-speed connectivity and the ability to support multiple devices simultaneously are priorities, then the investment might be justified. On the other hand, if your usage primarily consists of basic browsing and streaming, sticking with your current setup may suffice for now.
How to Connect Specific Brands/Models (e.g., Dell) to Wi-Fi
When it comes to connecting specific brands like Dell to Wi-Fi, the process typically remains straightforward but can vary slightly based on the model. To begin, locate the Wi-Fi icon on the taskbar, which looks like a series of ascending bars. Click on it to view available networks; here you’ll select your desired network from the list. Once selected, a prompt will appear requesting the network password. Enter the password carefully, as it’s case-sensitive. If the connection is successful, you’ll receive a confirmation message. Additionally, for newer Dell models, there’s often a dedicated function key (usually F2 or a wireless symbol) that allows you to enable or disable Wi-Fi. Make sure this is enabled for a smooth connection. If you’re encountering any issues, consider checking the network settings or using the Dell SupportAssist tool for troubleshooting assistance, ensuring a seamless internet experience.
Step-by-Step Guide for Windows 7 Users
To connect your desktop to Wi-Fi using Windows 7, start by ensuring that your wireless adapter is properly installed and enabled. Click on the network icon located in the system tray at the bottom right corner of your screen. A list of available networks will appear; choose your Wi-Fi network from the list. If your network is secured, you’ll need to enter the password when prompted. Once you’ve typed in the correct password, click “Connect.” Windows will take a moment to establish a connection. After successfully connecting, you can verify your network status by clicking on the network icon again to see if it shows as connected. If you encounter any issues during this process, consider troubleshooting your wireless adapter or checking for updates in your device manager.
Hidden Factors Affecting Desktop Wi-Fi Speed
When connecting your desktop to Wi-Fi, several hidden factors can play a crucial role in determining the speed and reliability of your connection. Firstly, the positioning of your desktop in relation to the Wi-Fi router significantly impacts signal strength; obstacles such as walls or furniture can create interference, weakening the signal. Additionally, the presence of other electronic devices—including microwaves and cordless phones—can disrupt Wi-Fi frequencies, further diminishing performance. It’s also worth noting that the channel your router operates on affects throughput; if multiple networks are vying for the same channel in a densely populated area, congestion can occur. Lastly, older network adapters may not support the latest Wi-Fi standards, limiting your desktop’s ability to fully utilize available bandwidth. Awareness of these factors is essential for optimizing your desktop’s Wi-Fi connectivity and ensuring a seamless internet experience.
how do I get Wi-Fi onto my pc? : r/pcmasterrace
To connect your desktop to Wi-Fi, ensure your PC has a wireless network adapter. Then, access the network settings by clicking on the Wi-Fi icon in the taskbar. Select your desired Wi-Fi network, enter the password, and click ‘Connect’ to establish a wireless connection effortlessly.