
When your Mac app freezes and stops responding, you don’t need to panic or restart your entire computer. Force quitting is your quick solution to regain control and get back to work.
Force quit is a Mac feature that immediately closes unresponsive applications. Think of it as a digital “emergency stop” button that shuts down frozen apps without affecting your other programs or files. It’s completely safe and takes just seconds to execute.
This guide walks you through three reliable methods to force quit any stubborn app on your Mac. Whether you’re dealing with a frozen browser, unresponsive document editor, or crashed game, these techniques will restore your productivity instantly.
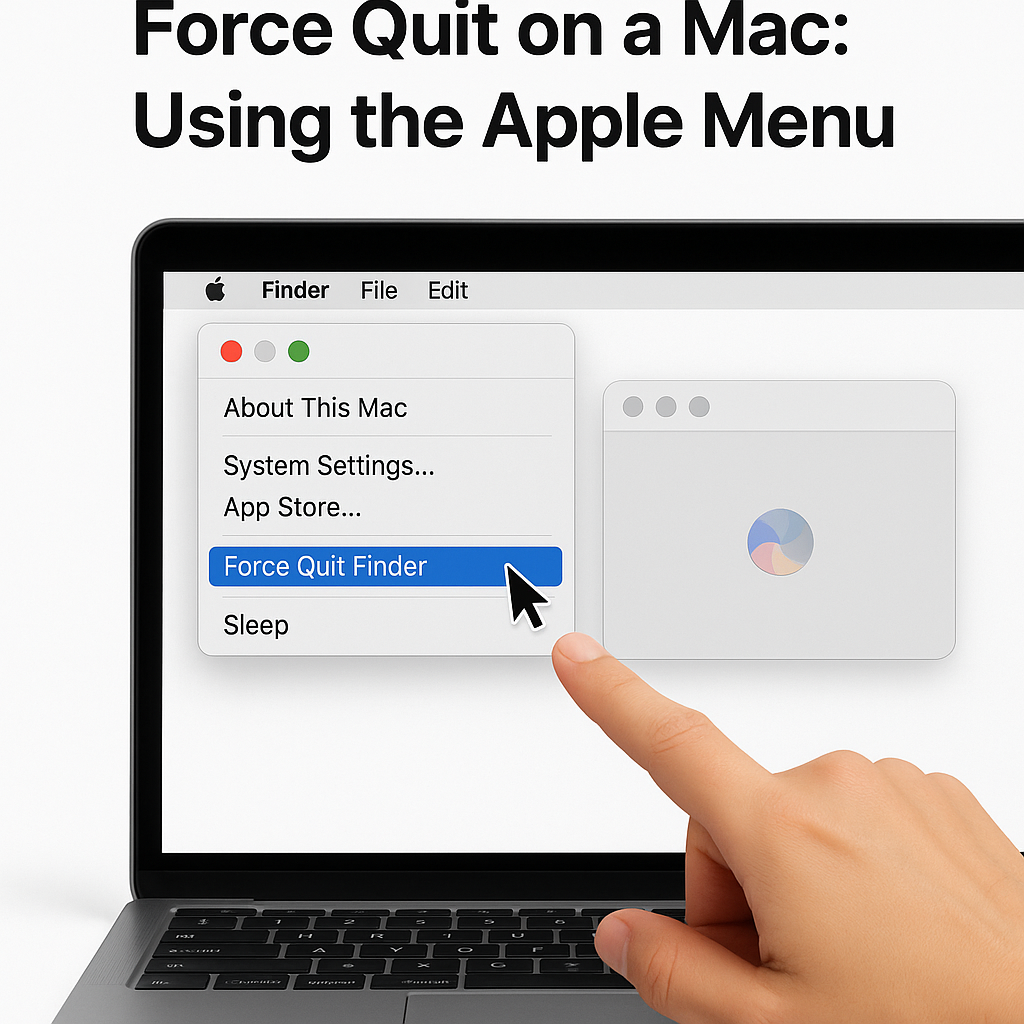
Method 1: Using the Apple Menu (Easiest for Beginners)
Step 1: Click the Apple logo in the top-left corner of your screen
Step 2: Select “Force Quit” from the dropdown menu that appears
Step 3: A window titled “Force Quit Applications” will open, showing all currently running apps
Step 4: Click on the frozen app you want to close (it may show “Not Responding” next to its name)
Step 5: Click the “Force Quit” button in the bottom-right corner
Step 6: Confirm by clicking “Force Quit” again in the pop-up dialog
The app will close immediately, and you can reopen it fresh when needed.
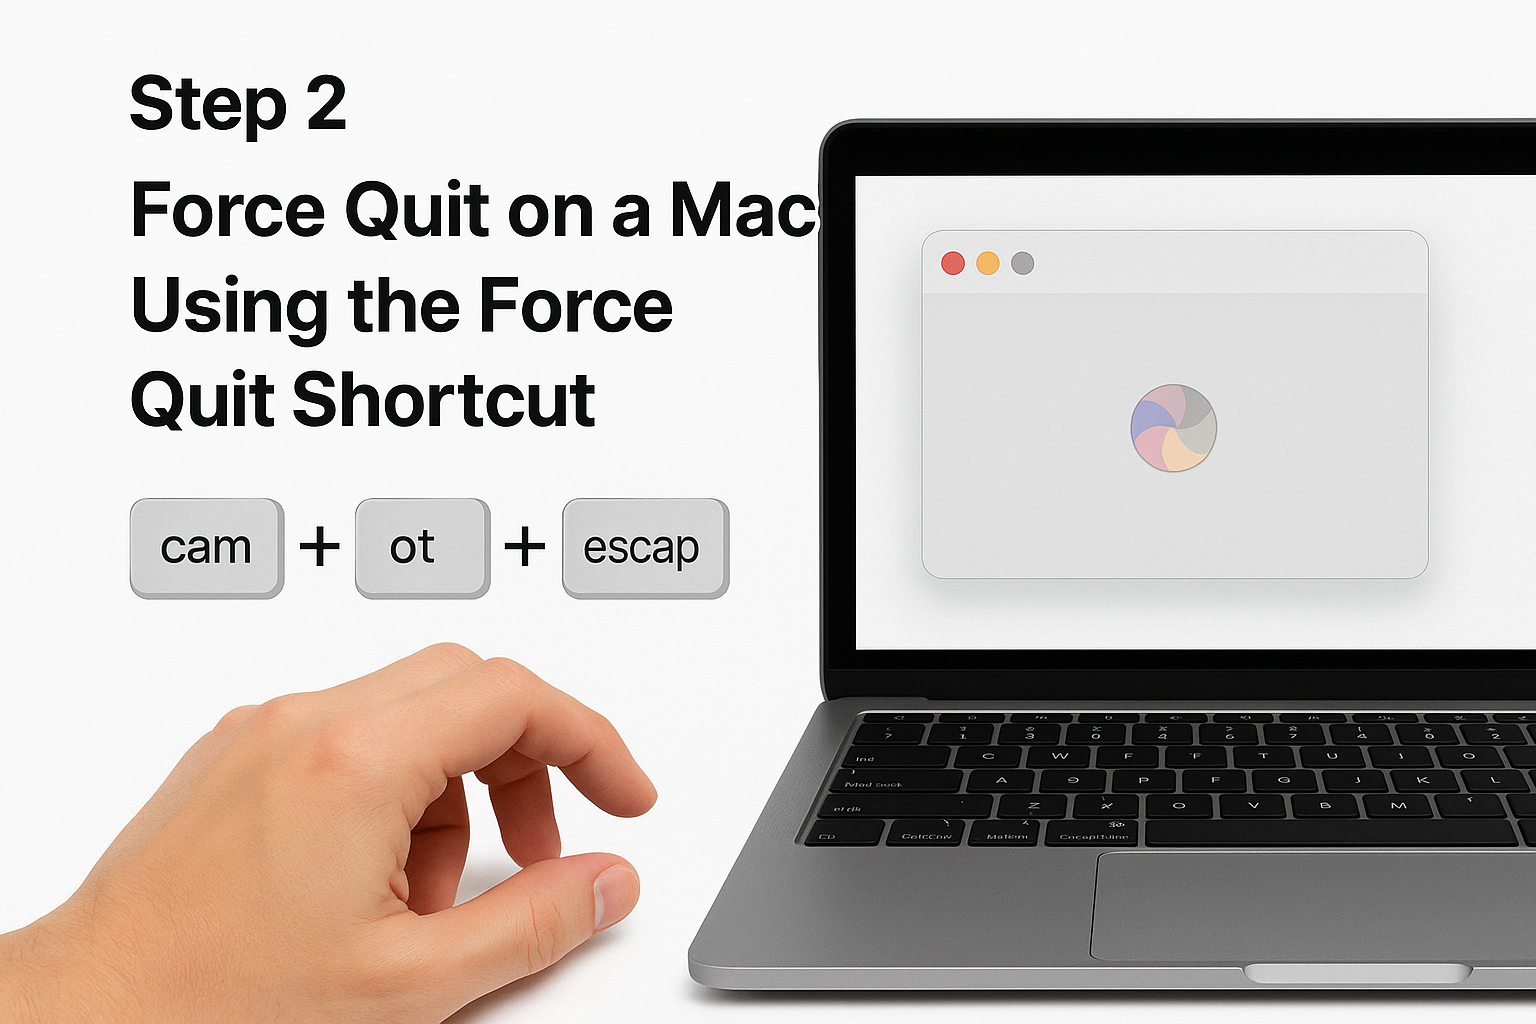
Method 2: Using the Force Quit Shortcut (Fastest Method)
Step 1: Press and hold these three keys simultaneously: Command (⌘) + Option + Escape
Step 2: The Force Quit Applications window appears instantly
Step 3: Click the frozen app from the list
Step 4: Click “Force Quit” and confirm your choice
This keyboard shortcut is the fastest way to access force quit, especially when your mouse cursor is unresponsive.
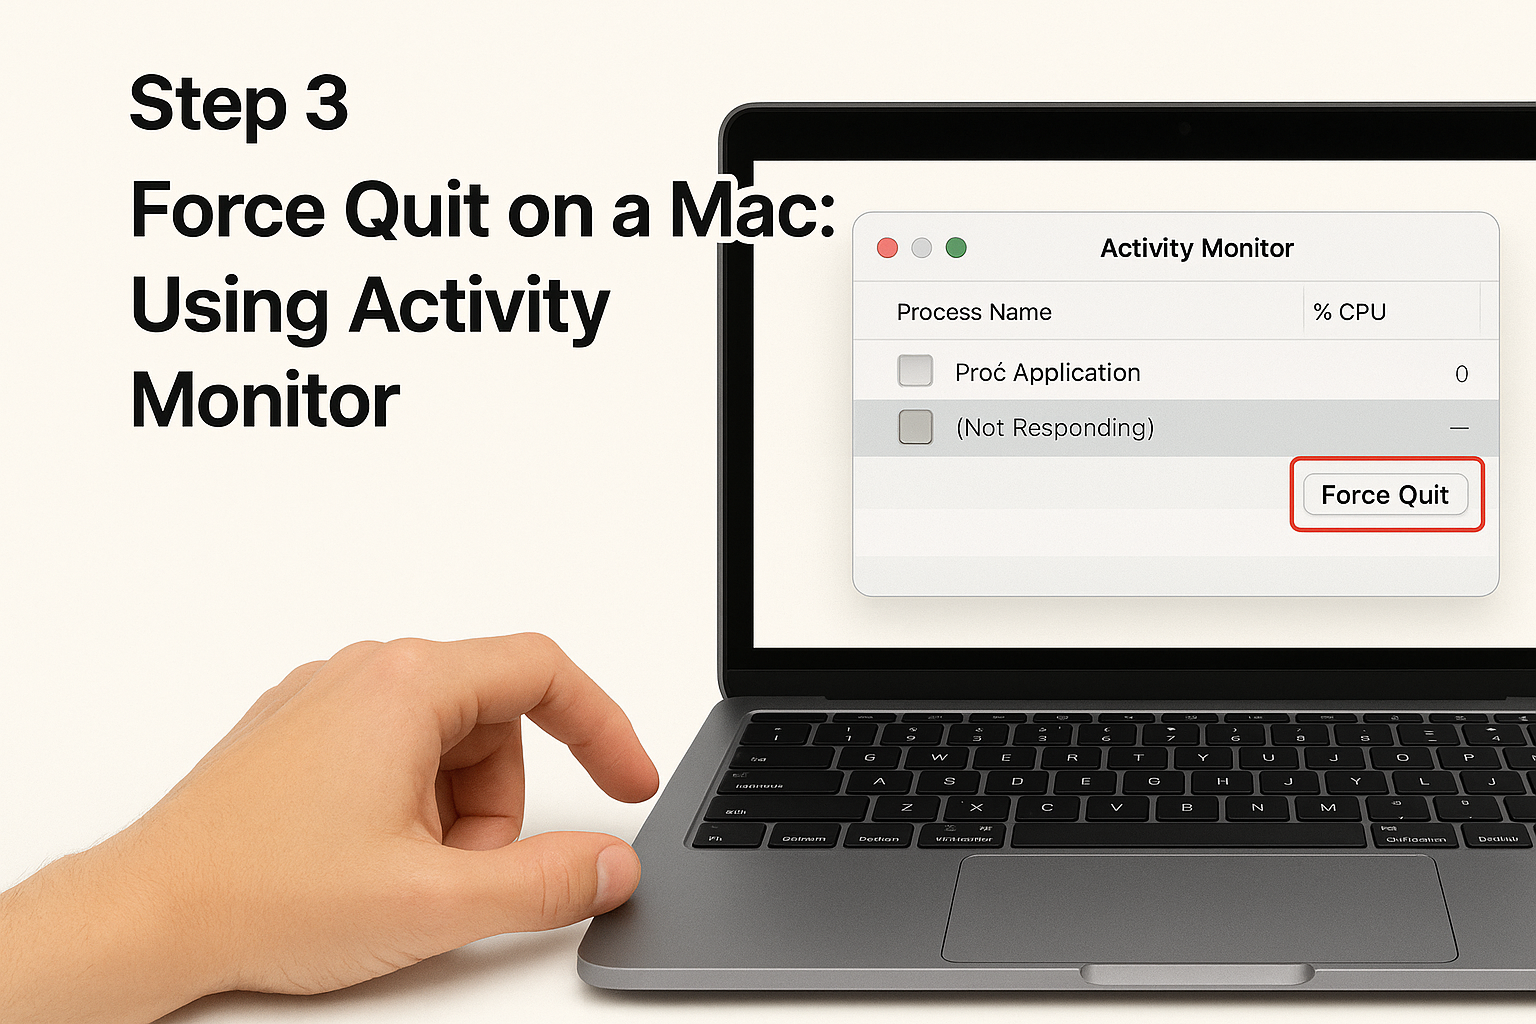
Method 3: Using Activity Monitor (Most Detailed Control)
Step 1: Open Spotlight search by pressing Command (⌘) + Space
Step 2: Type “Activity Monitor” and press Enter
Step 3: In the Activity Monitor window, find your frozen app in the list
Step 4: Click on the app name to select it
Step 5: Click the “X” button in the top-left corner of the Activity Monitor window
Step 6: Choose “Force Quit” from the dialog that appears
Activity Monitor shows you exactly how much memory and processing power each app is using, making it perfect for identifying resource-heavy programs.
Pro Tips for Better Mac Performance
If Force Quit Doesn’t Work: Try the method again, then restart your Mac if the app still won’t close. Some system-level processes require a full restart to resolve.
Prevent Future App Freezes:
- Keep your Mac updated with the latest software
- Close unused apps regularly to free up memory
- Restart your Mac weekly to clear temporary files
- Monitor storage space—keep at least 10% free
When to Restart Instead: If multiple apps are freezing or your entire Mac feels sluggish, a restart is more effective than force quitting individual apps.
Take Control of Your Mac Today
Save this guide for the next time an app decides to freeze on you. Bookmark this page so you can quickly reference these steps whenever you need them.
Want more Mac productivity tips delivered straight to your inbox? Subscribe to our newsletter for weekly tutorials that help you master your Mac and work more efficiently. Your future self will thank you when you’re troubleshooting with confidence instead of frustration.